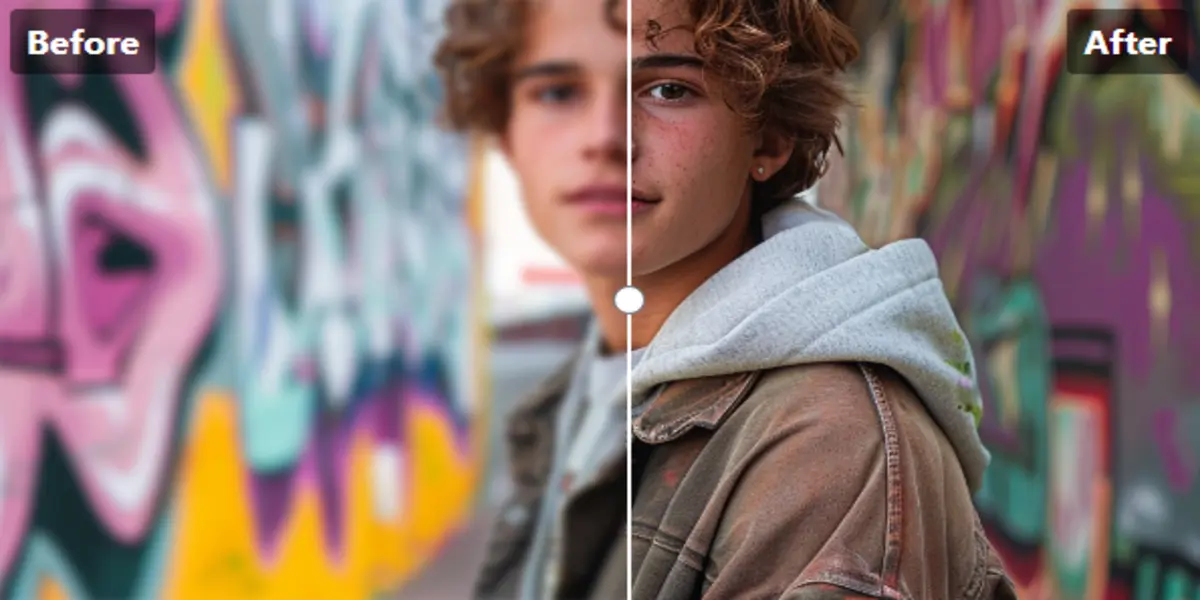
How do you enhance a pixelated photo in Photoshop? It is a common question asked by everyone and in this guide, you will be going through this process where you will learn how to enhance photo quality in Photoshop.
What is Image Resolution?
Image resolution means how much quality a tool holds, measured by pixels, and the number of pixels on a screen, called image or video resolution. The higher the number of resolution pixels, the higher the image quality.
A normal image is approxe 72 Dpi (dot per inch) which varies for some image formats JPG (JPEG) is 72 for the web and 300 dpi for print as far PNG, Webp, GIF, BMP, SVG, and HEIF. The high resolution of an image format truly matters.
Here’s a question that arises, is it possible to increase image quality? So the answer is yes you can do it in multiple ways like by Photoshop, Photo enhancer Software, Online photo enhancers, and Imgify photo enhancer.
How to Enhance Image quality with Photoshop
Key Steps to do that:
- Import the Image
- Color Balance
- Brightness and Contrast
- Sharpen the Image
- Remove Noise
- Save Image
Import The Image
First import an image you want to edit, to do so click on files then open it and select the image you wish to edit or you can drag and drop that image you want to edit.
Color Balance
Every photographer uses to enhance their image color to enhance the image. Correcting color adds quality to your image and to create a dynamic color you can use Photoshop’s color balance tool.
Steps to Apply Color Balance to Your Image
- Adjust panel
- Color Balance
- In Color Balance1 choose any tone balance
- After getting the best color, change the file name from color balance1 to anything else
Brightness and Contrast
Getting the right light while shooting is difficult for every photographer. Because of this, some photos may look dark and some look light. To adjust this problem we use Photoshop brightness or light settings. Increasing contrast in your image makes it a little hard and enhances colors and decreasing can be caused for black and white images.
There is no hard and fast rule for brightness but make sure to adjust it according to your image light as increasing can cause more light in the image and decreasing make your image dark so you have to adjust it on your own.
Steps to Adjust Brightness and Contrast
- Menu bar < Image
- Adjustments < Brightness and Contracts
- Slide the Slider to increase and decrease light and contrast
- Click OK and settings will be applied
Sharpen the Image
Little blur or lack of sharpness makes your overall image quality dull. The solution is to use the Photoshop Sharpening tool. This makes your image deblur and corrects overall lens distortion. Sharpness makes your image sharper too, it may be a bit hard to see the details normally.
Steps to Sharpen Your Image
- Background Layer < Duplicate Layer
- Blend Luminosity of the new layer to prevent form color misshaping
- Filter > Sharpen > Un sharp Mask
- Un sharp Mask
- Move the Charge slider to decide the amount of sharpening, The Radius slider specifies the width of the sharpening effect at the borders of images. The Threshold slider shows how different the sharpened pixels must be from other covering pixels of the image.
Remove Noise
Noise can be caused by pixelated images. It can be due to color distortion or Luminosity distortion. Color noise appears when color is distorted and luminosity occurs when the grain is seen on your image.
Steps to Remove Noise From Images
- Filter > Noise > Reduce Noise
- Next, move various sliders to modify the noise of the image. The Strength slider defines overall noise reduction, the Preserve Detail slider holds sharpness, and the Reduce Color Noise and Sharpen Details sliders further purify the noise reduction stages.
After accomplishing all these things you will get a unique look of your image which is improved and beautiful. In this way, you can enhance blurry photos in Photoshop.
Importance of Photo Enhancing
In this age, everyone wants their images in high quality form and if your images are dull and low quality it looks pixelated and blurry. To prevent this type of thing you can use Photoshop to enhance your image in easy steps and create an image that stands out over social media.
The Dissimilarity Between Image Enlargement and Resolution Improving
Image Enlargement and resolution improvement both are separate things. It is a process of increasing image dimensions and overall physical size. On the other hand, resolution enhancement means increasing images visual.
Online Tools For Image Enhancement
Here are the top 10 best online photo enhancer tools:
- Imgify
- Let’s Enhance
- Deep Image
- Waifu2x
- Bigjpg
- AI Image Enlarger
- VanceAI Image Enlarger
- PixBim Enlarge AI
- Fotor
- PhotoZoom Pro
By using these tools you can enhance your images in easy steps and all your other work will be done by AI.
Tips for Increasing Image Resolution
Here are some simple and easy tips for increasing image resolution:
- Use Photoshop’s Super Resolution: Use the Adobe Photoshop super-resolution feature to enhance image resolution while enlarging.
- Apply Image Resampling: Choose the right method and make sure to maintain it while enlargement.
- Adjust Image Size Gradually: Improve your image in snappy pieces rather than all at once.
- Sharpen After Upscaling: After doing all settings, apply a little sharpening on your image to enhance it more.
- Consider Vector Graphics: For logos use vector graphics rather than images.
By applying these tips you can enhance and maintain your image resolution effectively.
FAQs
How to enhance an image in Photoshop?
Repeat after me:
- Import the Image
- Color Balance
- Brightness and Contrast
- Sharpen the Image
- Remove Noise
- Save Image
Does upscaling increase resolution?
Yes, Upscaling can increase your image resolution.
How do I fix low quality in Photoshop?
By adjusting the size and up sample you can fix low quality in Photoshop.
Can we convert a normal photo to HD?
For this purpose, you can use the Imgify photo enhancer tool. It enhances your image up to 4k.


